Discussion Topic
User avatar

Parameters for Surfacing with Amana tool 45525

Hi all,

I am facing lot of burns and sign when surfacing. My setup:

  • Original Workbee router - generally running on speed 1 or 2
  • Bit: Amana Tool – 45525 – Carbide Tipped Surfacing / Rabbeting / Flycutting CNC Router Bit – 1-1/8″ x 1/2″ – 1/4″ Shank – 1-13/16″
  • Stepdown between 0.5 to 2 mm
  • Using plywood
  • Surfacing program generated using Fusio360

What I tried:

  • Slowing the router to lowest speed (1)
  • Speeding the machine traveling
  • Cooling the bit with air
  • Generating a toolpath in all possible directions: both direction, left to right only and opposite, top to bottom and bottom to top

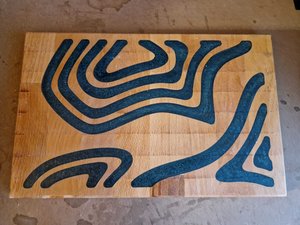
The attached image is even a good result, generally signs and burns are way worse.

I always end up with marks or burns. Is anyone facing the same issue or did someone find a solution to it? What is your setup?

Block Image

Block Image

Reply to discussion Subscribe to discussion

Is this a worthwhile discussion?

Score 0
Add a comment

2 Replies

Most Helpful Answer
User avatar

Hi Julien,

I think it could be a trimming issue. If there are cut lines on the bottom surface of a piece of material, the router head needs tramming.
Tramming the Router Head is completed after surfacing the spoilerboard and will make sure the end mill is parallel to the spoilerboard.

To tram a Router Mount, we recommend creating a tool similar to this video: https://www.youtube.com/watch?v=9h5srzEB...

To tram the Y-Axis, this can be completed in a similar fashion to the video above. However, loosen the bolts on both sides indicated by the green arrow in Step 1 of this guide: 4. X-Gantry Assembly

To tram the X-Axis, attach the Height Reference tool, as per Step 3 in this guide: 7. Router Mount

And complete Step 4 to attach the Router Mount perfectly on top of the height reference tool.

Original WorkBee Z1 Plus  Assembly Manual Image

Guide

4. X-Gantry Assembly

Difficulty:

Moderate

1 - 40 minutes

Original WorkBee Z1 Plus  Assembly Manual Image

Guide

7. Router Mount

Difficulty:

Moderate

15 - 20 minutes

Was this reply helpful?

Score 1

Comments:

Hi Robert,

Thank you very much for your help! Will take a while but I will try and let you know if it works.

by

Add a comment
User avatar

Thanks for this thread. I feel like this should be included in the official post-assembly calibration instructions. I've just built my Workbee, surfaced my spoilboard and found tram lines throughout the Y-axis. Have tried searching everywhere online for Workbee-specific tramming instructions but to no avail until finding this in the forums! Still confused as to why there isn't any instructions on this in the official assembly build.. Do most CNCers not tram their machines? Thanks again.

Was this reply helpful?

Score 0
Add a comment

Join the discussion

Author avatar Julien Moro will be eternally grateful.
View Statistics:

Past 24 Hours: 0

Past 7 Days: 1

Past 30 Days: 12

All Time: 72