Introduction
Please read before proceeding to avoid damaging the controller and voiding your warranty
- Avoid connecting the Duet via USB when you do not need to. (Except when instructed to in the guides)
- Always unplug the WorkBee Power Supply before connecting the USB Cable.
-
-
Open the Control Panel on your windows computer.
-
Click 'Network and Internet'.
-
Open the 'Network and Sharing Center' and click 'Change Adaptor Settings'.
-
Right Click on the Ethernet Port and click 'Properties'.
-
For Mac users goto System Preferences > Network. Select 'Ethernet' from the left pane.
-
-
-
Click on 'Internet Protocol Version 4' so it is highlighted. Then press the 'Properties' button.
-
Select 'Use the following IP address'
-
For Mac users change the 'Configure IPv4' dropdown to 'Manually'
-
Enter the following IP Addresses
-
IP Address: 192.168.251.1
-
Subnet mask: 255.255.255.0
-
Default gateway: 192.168.251.0
-
For Mac users set Router: 192.168.251.0
-
-
-
Plug the Ethernet Cable into the Ethernet port on the Duet Controller. Plug the opposite end into the Ethernet port on your computer.
-
Plug the mains cable of the Power Supply into the wall socket.
-
Turn on the wall socket and the power switch on the side of the Power Supply.
-
Open your browser and enter the url: http://workbee.local/
-
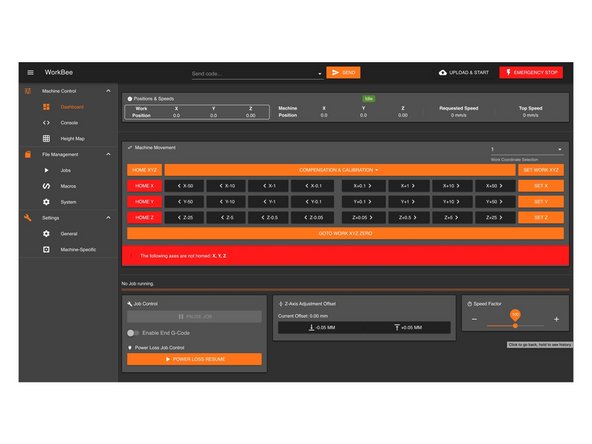
You should now see the WorkBee Control Interface!
-
Bookmark the url and add it to your favourites for easier access in the future.
-
If the above url does not work. Please use the IP Address 192.168.251.2 to connect to the machine. Bookmark this IP Address.
-
Thanks for following the guide. Any issues, please contact us!
Thanks for following the guide. Any issues, please contact us!
Cancel: I did not complete this guide.
15 other people completed this guide.
8 Comments
Hi Richard,
Rather than going to WorkBee.Local have you tried going direct to the IP Address: 192.168.251.2
Robert -
hi
i have followed all instruction as per but workbee control panel not coming up
richard carter - Resolved on Release Reply


