
-
-
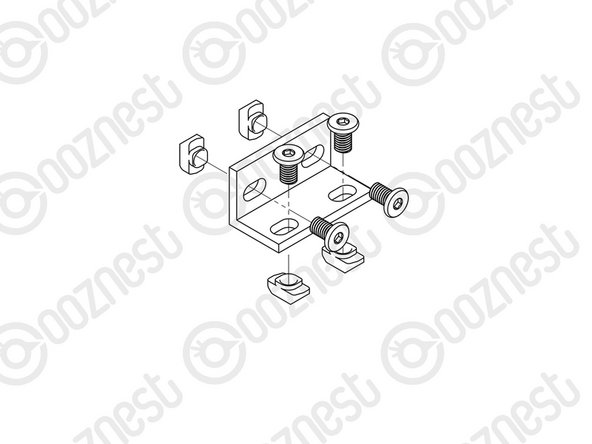
Using the M5-Button-Head-Bolt-8mm provided and M5-Drop-In-Tee-Nuts construct all Corner-Joining-Plates as pictured.
-
Do not tighten the M5-Drop-In-Tee-Nuts as they need to be loose to engage with the extrusion.
-
-
-
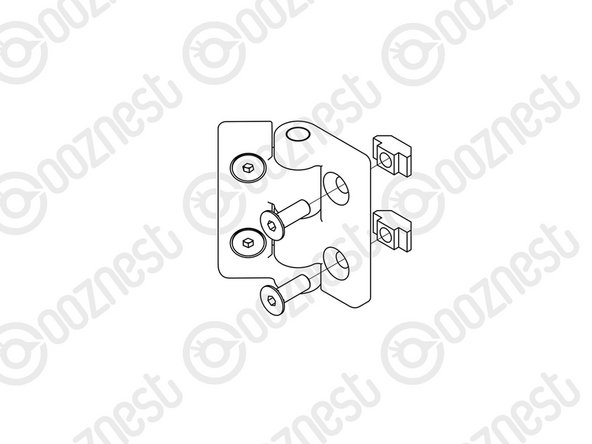
Using the M5-Button-Head-Bolt-8mm provided and M5-Drop-In-Tee-Nuts construct the T-Joining-Plate as pictured.
-
Do not tighten the M5-Drop-In-Tee-Nuts as they need to be loose to engage with the extrusion.
-
-
-
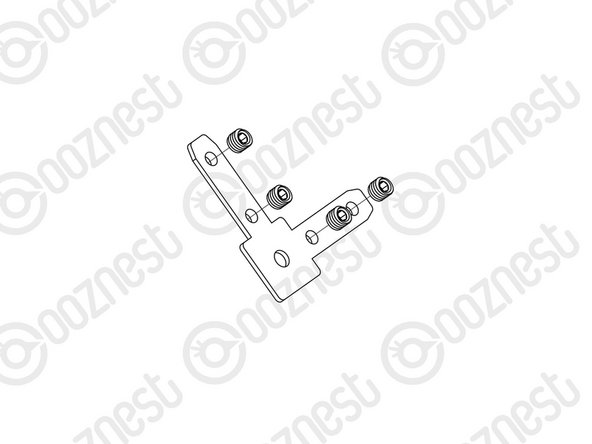
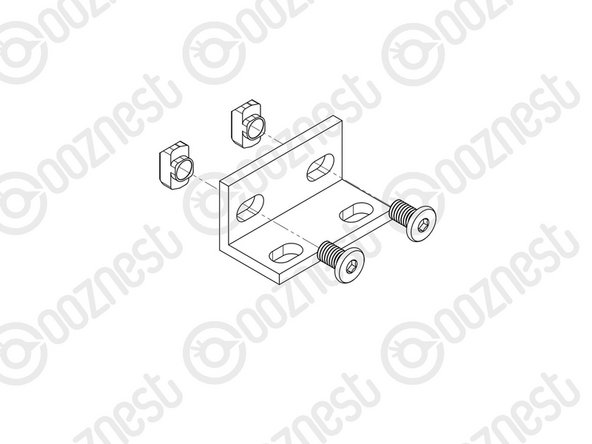
Using the M5-Button-Head-Bolt-8mm provided and M5-Drop-In-Tee-Nuts construct 10 x Universal-L-Brackets as pictured.
-
Do not tighten the M5-Drop-In-Tee-Nuts as they need to be loose to engage with the extrusion.
-
-
-
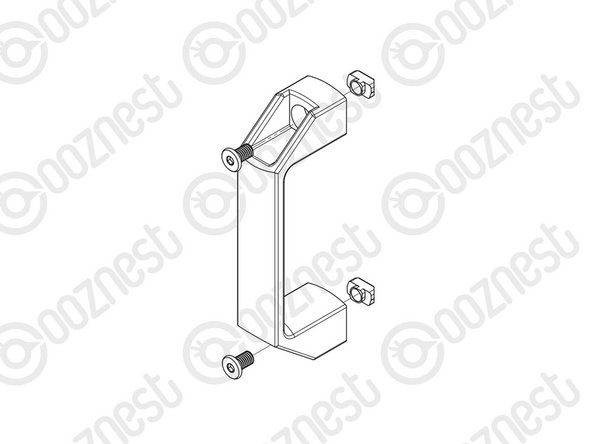
Using the M5-Button-Head-Bolt-8mm provided and M5-Drop-In-Tee-Nuts construct all Door-Hinges as pictured.
-
Do not tighten the M5-Drop-In-Tee-Nuts as they need to be loose to engage with the extrusion.
-
-
-
Thread the grub screws into the Maker-Links until they hold themselves in place.
-
-
-
Using the M5-Button-Head-Bolt-10mm provided and M5-Drop-In-Tee-Nuts construct all Door-Handles as pictured.
-
Do not over tighten the M5-Drop-In-Tee-Nuts as they need to be loose enough to engage with the extrusion profile.
-
-
-
Using the M5-Button-Head-Bolt-8mm provided and M5-Drop-In-Tee-Nuts construct 4 x Universal-L-Brackets as pictured. Use these brackets to secure the Enclosure to your work surface.
-
Do not over tighten the M5-Drop-In-Tee-Nuts as they need to be loose enough to engage with the extrusion profile.
-
-
-
Guide Complete - Proceed to 2. Assembling The Enclosure Doors
-


Thanks for following the guide. Any issues, please contact us!
Thanks for following the guide. Any issues, please contact us!
Cancel: I did not complete this guide.
15 other people completed this guide.

2 Comments
I’m not complaining, just trying to be productive.
Would be really helpful if the instruction description matched the name of the parts on the bags.
”M5-Button-Head-Bolt-8mm” are called “Low Profile - M5 - 8mm” on the bag in the box. I think (cross fingers).
Mark Williams - Resolved on Release Reply
Hi Mark,
Thanks for your comment.
I think it is because you might have a slightly older enclosure, on recent ones all the names have been changed to match the WorkBee CNC Machine.
Thanks.
Robert -