
-
-
The user is solely liable for ensuring operation of the WorkBee with this Emergency Stop is compliant with the necessary safety requirements of their workspace.
-
The Emergency Stop is not an On/Off button. The use of the Emergency Stop should be unconditional with no decision-making process involved.
-
The Emergency Stop will only stop the movement of the WorkBee. It will not stop the Router Head.
-
It is up to the user to decide whether the Router Head can be suitably stopped in an emergency situation.
-
The Emergency Stop has been wired and tested by Ooznest. Do not tamper with it. It is void if tampered with.
-
The Emergency Stop is void if used on anything other than an Ooznest Original WorkBee provided by Ooznest using standard parts and default settings. The Emergency Stop is void if any peripherals are connected to the controller of the Original WorkBee, other than those listed on learn.ooznest.co.uk but not including the community sections.
-
If there is access around all 4 sides of the machine, we recommended mounting the Emergency-Stop button on your workbench at the front left corner of the machine.
-
This suggested positioning is a recommendation. It is up to the user to ensure the Emergency Stop is located in a suitable position with easy access in an emergency situation.
-
-
-
Put the machine roughly in its final resting spot on a solid flat surface.
-
The machine will be screwed down later.
-
Position the Emergency Stop in a suitable postion.
-
Use 2 x Button-Head-Screw-20mm's to secure the Emergency Stop to the workbench through the holes located on the bracket.
-
A Pozi #2 Screwdriver should be used.
-
We recommend trailing the cables under your workbench to keep the surface free of cables.
-
-
-
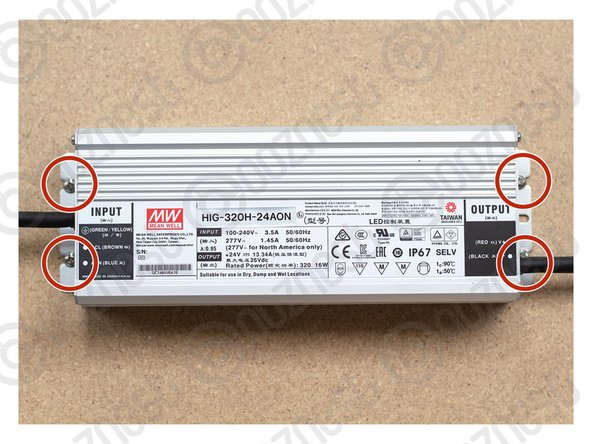
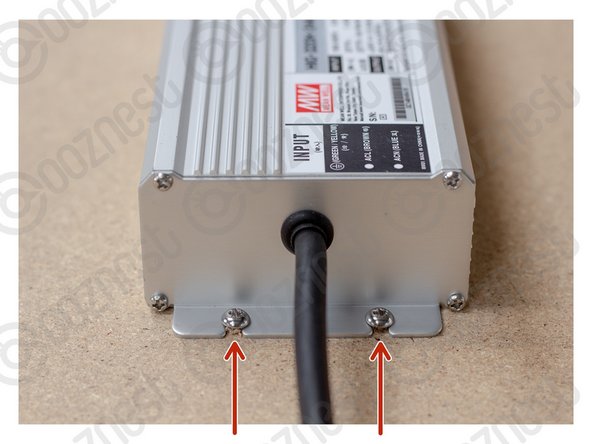
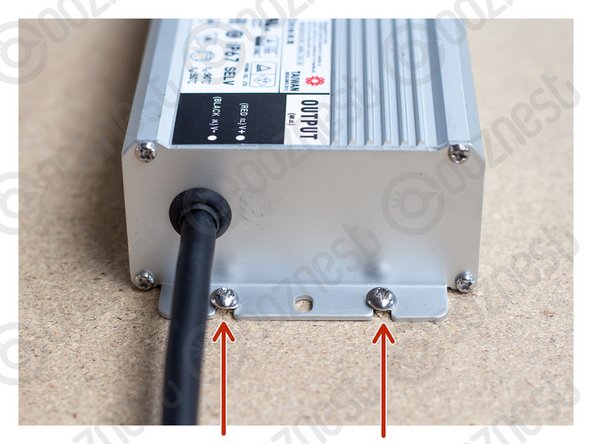
Using 4 x Button-Head-Screw-20mm mount the Power Supply.
-
The position of the Power Supply depends on where your wall power outlets are.
-
The mains cable provided is 2.5m.
-
Ideally it should be mounted on a shelf under the machine, or on the underside of the worktop.
-
-
-
Remember we have not told you to plug the power supply in yet, so please don't until we say so!
-
Guide Complete - Proceed to 4. Wire Routing
-


Thanks for following the guide. Any issues, please contact us!
Thanks for following the guide. Any issues, please contact us!
Cancel: I did not complete this guide.
47 other people completed this guide.

5 Comments
Question @robertooznest: why is the Emergency Stop fitted to the DC side? I wondered if it's due to immediacy, but my observation is that the power dies pretty quickly when the supply side is isolated.
I'm merely asking because I'm contemplating an supply side (A/C) emergency stop which feeds a double wall socket from which both the router head and the controller are powered; is that a bad idea for any reason?
Thanks again
Nick Handel - Resolved on Release Reply
Hi Nick,
The Router Head has its own separate AC Supply, so you would need your own ESTOP of that if you required it.
Robert -
Thanks @robertooznest that does make sense, of course. I have no experience at all yet so not really in a position to judge, but I'm trying to visualise scenarios in which those advantages would outweigh the benefits of also powering off the router head. Assuming we leave the DC button alone, would you advise against putting a separate one on the A/C side that also stops the router head?
Hi Nick
It is because on the DC because it is faster, safer and is more effective a power isolation, and any stored capacity energy in the PSU is stopped.
Robert -
I didn't do this at this stage. My feeling was that until I had completed built the machine and determined it's exact position on the work table, it would be pretty arbitrary trying to determine where to mount the power supply and the emergency stop (cart before the horse).
Maybe there's a specific reason for putting this at this point?
Nick Handel - Resolved on Release Reply