
-
-
You are going to need our Motor Wire and Limit Switch Cheat Sheet. We recommend printing it off!
-
-
-
Motor-Wire-6 is coming out of the Moving End of Drag-Chain-X.
-
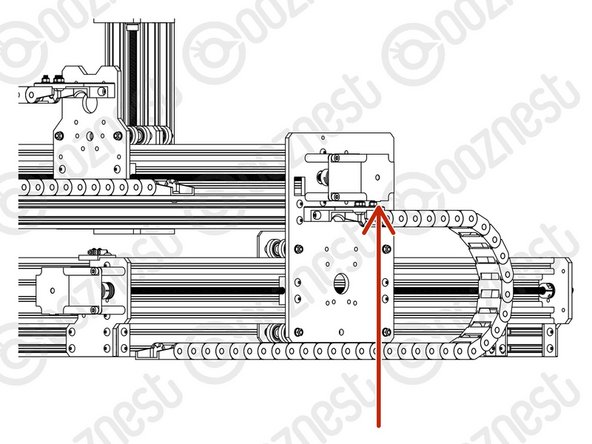
Feed Motor-Wire-6 through the Drag-Chain-Mount and plug it into the pigtail on the Z-Axis Stepper-Motor.
-
Feed the wire from Limit-Switch-2 through the Drag-Chain-Mount and then through Drag-Chain-X so it comes out the Fixed End.
-
Secure the Limit-Switch-2 wire and Motor-Wire-6 together to the Drag-Chain-Mount using a small cable tie as in Image 2.
-
Make sure there is enough slack on Motor-Wire-6 for the full travel of the Z-Axis.
-
Any unneeded slack in both these wires should be pulled out at the Fixed End of the Drag-Chain-X.
-
If you have the Touch Probe you can route that wire through Drag-Chain-X like Step 4 of Assembling Your Original WorkBee XYZ Touch Probe
-
Secure the wire to the Drag-Chain-Mount using a small cable tie. Then secure it along Motor-Wire-6.
-
-
-
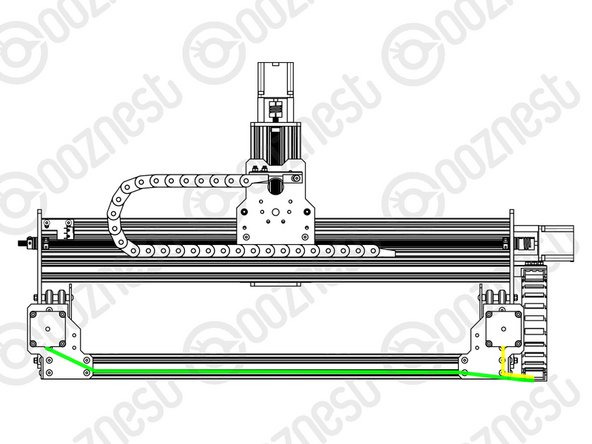
Motor-Wire-5 is coming out of the Fixed End of Drag-Chain-Y.
-
Tuck this wire into the bottom slot of Extrusion-A
-
Plug it into the right Y-Axis Stepper-Motor (If looking from the front)
-
Motor-Wire-4 is coming out of the Fixed End of Drag-Chain-Y.
-
Plug it into the left Y-Axis Stepper-Motor (If looking from the front)
-
Any slack in both these wires should be pulled out at the Moving End of the Drag-Chain-Y.
-
-
-
Plug Motor-Wire-3 into the X-Axis Stepper-Motor.
-
Leave it hanging for now.
-
-
-
That is all the wires routed. Now time to plug it all in!
-
Guide Complete - Proceed to 5. Controller
-


Thanks for following the guide. Any issues, please contact us!
Thanks for following the guide. Any issues, please contact us!
Cancel: I did not complete this guide.
55 other people completed this guide.
