Introduction
In this guide we will run through the steps to connect and configure a touch probe to your WorkBee or OX CNC running an XPRO controller.
Tools
Parts
-
-
Locate the Input screw terminals on the XPRO board.
-
Identify the Ground and Touch Probe inputs.
-
The wire attached to the crocodile clip, should be screwed into the ground terminal.
-
The remaining wire (attached to the Probe) should be screwed into the probe terminal.
-
-
-
Open up Universal G-code Sender (UGS) & connect to your WorkBee or OX CNC as normal.
-
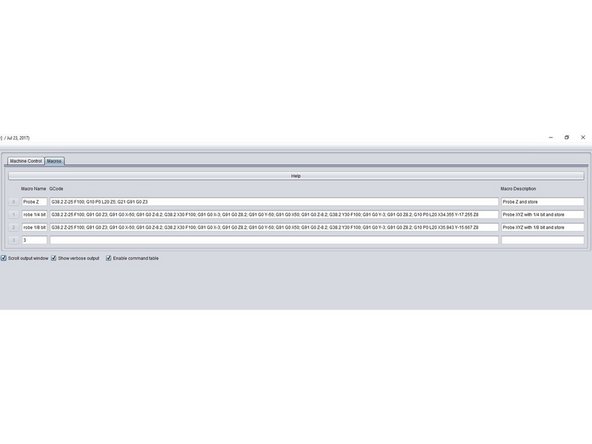
Locate and click on the Macros tab.
-
On this tab we can set-up a number of macros to work with the Touch Probe.
-
The first macro we will make is to probe the Z axis and store this value.
-
In the Macro Name field, give your macro a name. In our case we will use "Probe Z".
-
The next field is where we enter the GCode for our Macro. To probe and store the Z axis information we enter the GCode below. These commands are explained in the documents at the bottom of this guide.
-
G38.2 Z-25 F100; G10 P0 L20 Z5; G21 G91 G0 Z3
-
Lastly we can give our new macro a description such as "Probe Z and store"
-
-
-
To add more macros follow the steps above and use the PDF and spreadsheet documents at the bottom of this guide to configure your G-Code commands.
-
-
-
Now that you have set up your macros, for each size bit you want to use (1/4, 1/8, 1/16 etc) it's time to put them to action and find your zero point.
-
Once you have set up your job, ensuring the work piece is clamped down securely, then home your machine.
-
Place the touch probe on the bottom left corner of your work piece.
-
Now use the jog axis commands to centre the bit within the probe. Then attach the crocodile clip to the bit in your router.
-
You can then run your selected macro by pressing the correct macro number.
-
In this example we ran the macro to probe X, Y and Z for a 1/4" bit. When the macro had finished we told the WorkBee CNC to return to the zero point.
Don’t use touch probe if the router bit has any coating that insulates electrical contact. I used a 1/4” v-bit that has blue coating on the sides. Luckily I was close to the emergency stop button when the bit was pushing into the side of the touch probe but the electrical contact was not detected.
-
You are now set to use a touch probe and easily locate your work piece corners.
You are now set to use a touch probe and easily locate your work piece corners.
Cancel: I did not complete this guide.
14 other people completed this guide.
Attached Documents
3 Comments
having problems connecting the wires for the touch probe
Hello, I followed your tutorial and everything is fine. The question I wanted to ask you is that you have to do later to use that calculation of the zero position when I send a file to the cnc machine.I would be very grateful if you can resolve this doubt.a greeting
Hi, if you change the material it is advised to re-zero using a touch probe.


