
-
-
To complete this guide you will need a 250x250x18mm piece of MDF.
-
Use 4 x Wood Screws to secure the MDF to the Spoilerboard.
-
Make sure it is square with the machine.
-
Make sure the Wood Screws are flush with the surface of the MDF.
-
-
-
Always use the correct collet size for the cutter.
-
Mafell
-
Click the collet into the nut first, then insert the end mill fully.
-
Fix the collet with a maximum torque of 10-11Nm. Tighten the collet by hand, then a 1/8 turn with a spanner, this should be about right.
-
Keep the collet lubricated with a solid lubricant (e.g. Molykote P-40) or by lightly greasing.
-
Katsu
-
Push the collet into the shaft and then the nut over it. The end mill can then be inserted fully.
-
Only use the button on the side to hand tighten the collet. To fully tighten, use two spanners, a 13 spanner on the flat portion of the shaft, the included 22mm spanner on the collet nut.
-
-
-
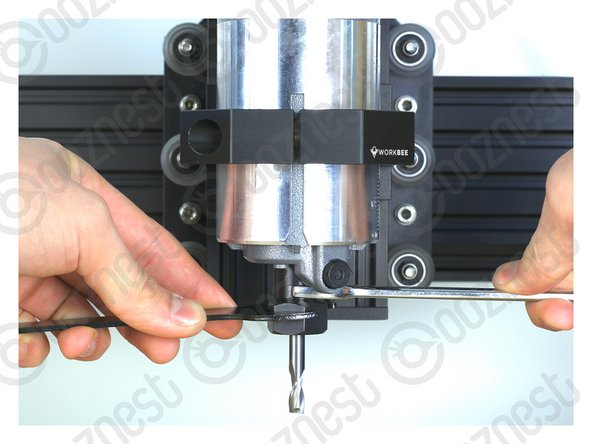
Turn off and unplug the Router Head from the mains.
-
Inside the Extras Box find the 1/4" Square Cut End mill.
-
Using a 1/4" collet secure the end mill to the Router Head.
-
The Mafell has a locking button on the side.
-
The Katsu requires a 13mm Spanner and the included 22mm Spanner.
-
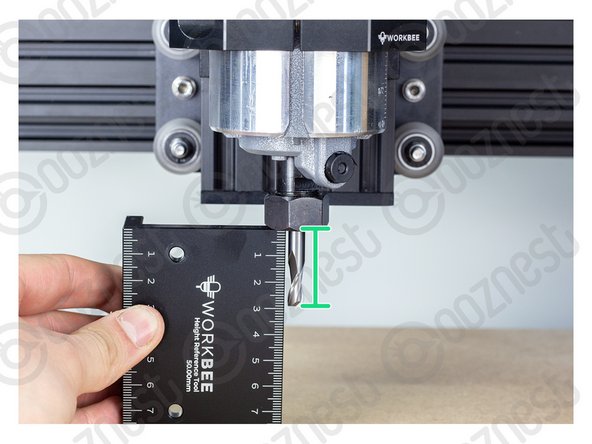
While tightening, set the end mill stick out to 30mm using the Height-Reference-Tool.
-
-
-
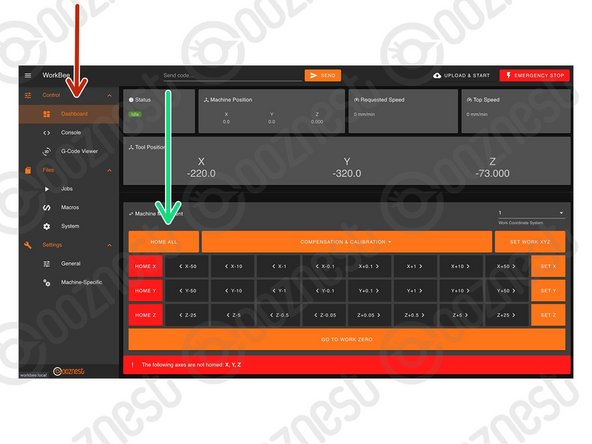
Turn on the machine and open WorkBee Control.
-
Go to Control > Dashboard
-
Press 'Home All'
-
The Machine should now be at the back-right corner of the work area.
-
-
-
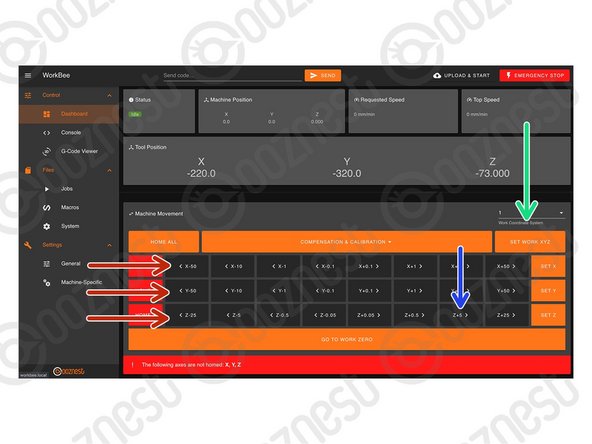
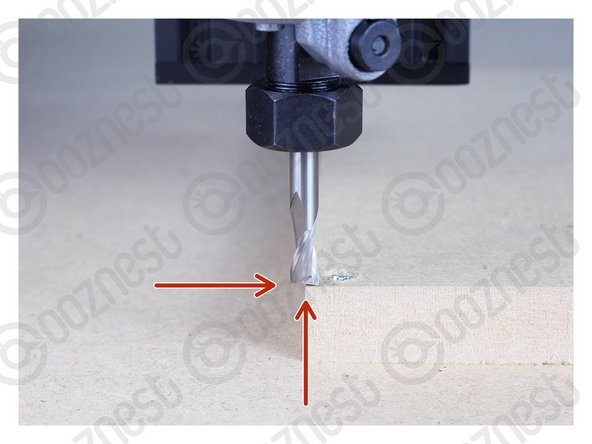
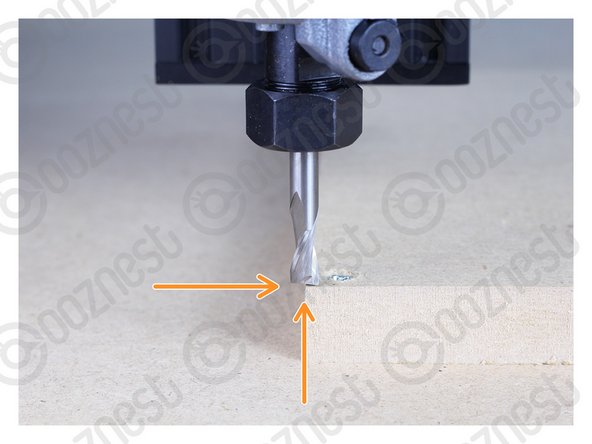
Use the job buttons to centre the end mill over the front left corner of the MDF.
-
The tip of the end mill should be flush with the top of the MDF.
-
Press 'Set Work XYZ' to set the work zero position.
-
Jog the Z-Axis up +5mm.
-
-
-
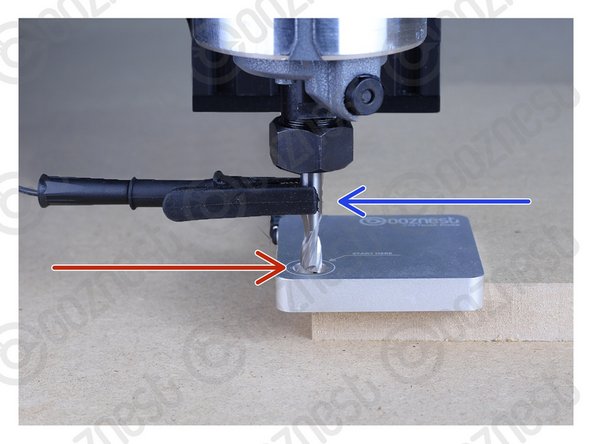
Locate your Touch Probe over the corner of the MDF.
-
Use the job buttons to centre the end mill in the 'Start Here' Hole.
-
With the tip of the endmill roughly level with the surface of the Touch Probe.
-
Plug your Touch Probe into the Touch Probe Mount Connector.
-
Clip the Crocodile Clip to the End mill.
-
-
-
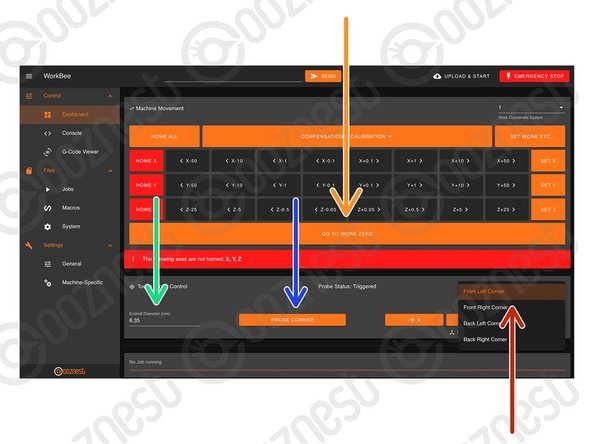
In the 'Touch Probe Panel' Select the Front Left Corner as the Probe Location.
-
Define the Endmill Diameter as 6.35mm
-
Press Probe Corner to begin probing.
-
Wait until the 'Probe Successful' confirmation.
-
Do not press any 'Set Work Zero' buttons after this.
-
Unclip the Touch Probe from the End mill and unplug it from Touch Probe Mount. Remove the Touch Probe.
-
Press 'Go to Work Zero'. Your machine should be perfectly aligned with the corner of the material.
-
Jog the Z-Axis up +5mm.
-
-
-
Download the WorkBee-First-Project file and extract the contents.
-
-
-
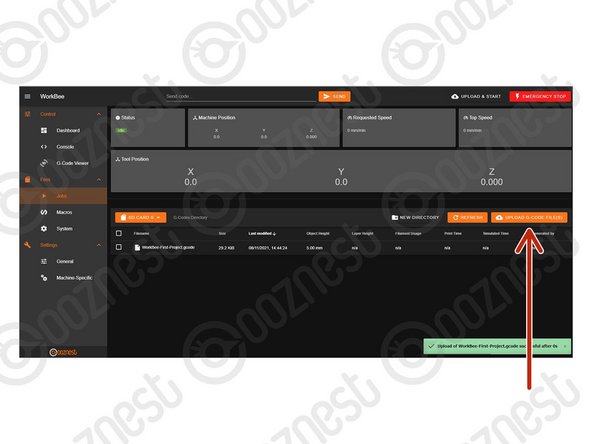
Go to File Management > Jobs and press 'Upload G-Code Files'
-
Navigate to where you extracted the download.
-
Select 'WorkBee-First-Project.gcode'
-
-
-
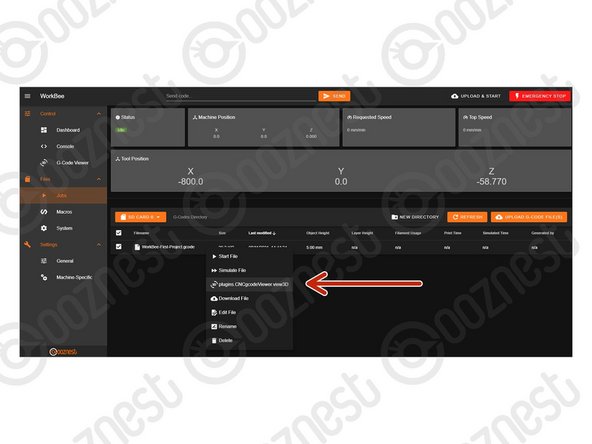
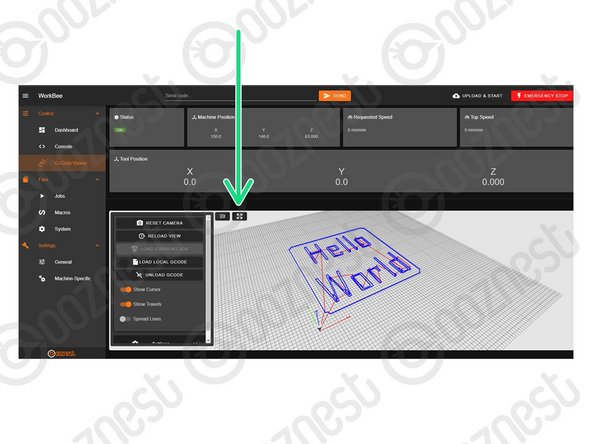
Right click the file under File Management > Jobs and press 'plugins.CNCgcodeViewer.view3D'
-
Go to Control > G-Code Viewer and view it fullscreen.
-
The grid shows the machines working area.
-
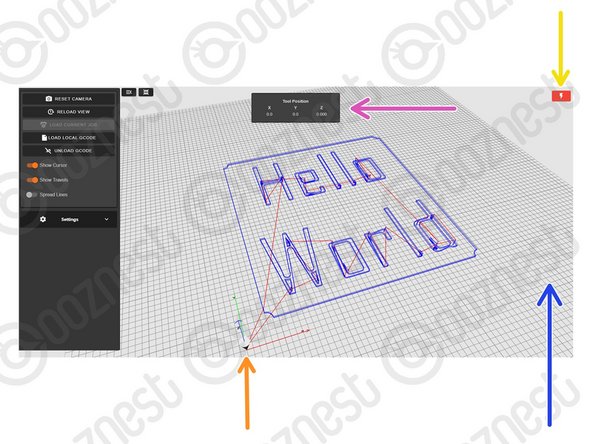
The X, Y, and Z-Axis markers show where the selected Work Zero is located in the machines working area.
-
Current position in Work Coordinates.
-
Software emergency stop.
-
If you press 'Unload G-Code' and reload it as above once the job is running, it will show the current progress in green.
-
-
-
Mafell
-
Set the thumbwheel on the Router Head to Number 6 (25000 RPM)
-
WorkBee Router Head
-
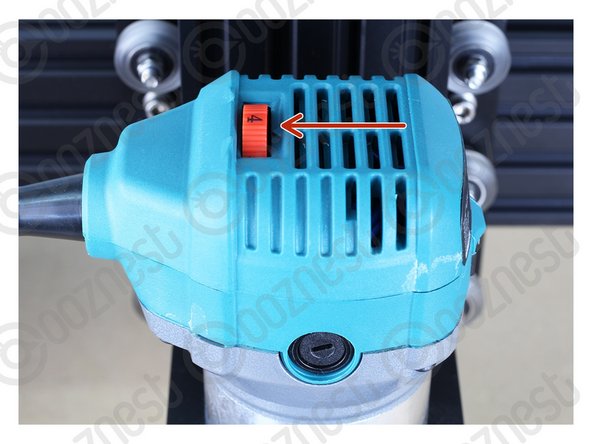
WorkBee Router Head/Katsu
-
Set the thumbwheel on the Router Head to Number 4 (25000 RPM)
-
-
-
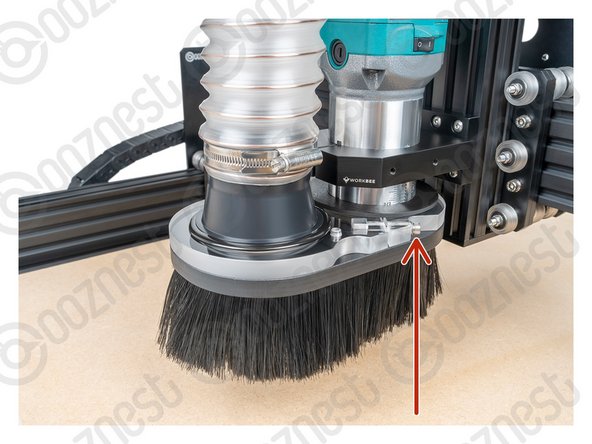
Adjust the height of the Dust Shoe so the tip of the brushes are just touching the MDF piece we are cutting.
-
Fix into position using the clamping bolt on the side of the Dust Shoe.
-
-
-
The MDF is secure.
-
The Work Zero is Set.
-
The Work Area is clear.
-
The End Mill is secure.
-
Safety Instructions Read.
-
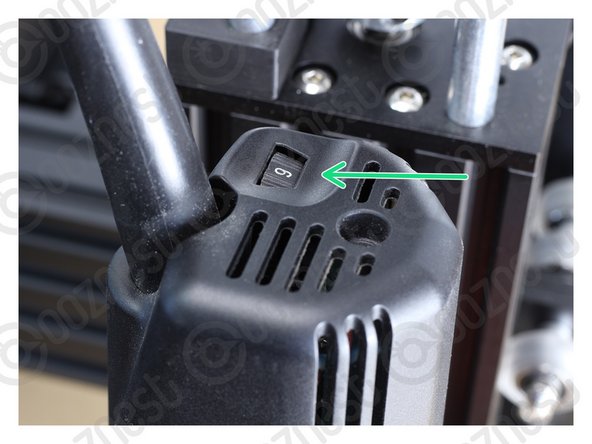
Switch on the Router Head.
-
Switch on your Extractor (If applicable).
-
-
-
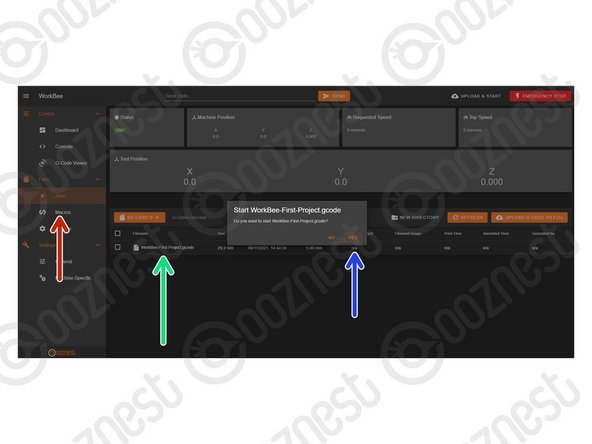
Go to Files > Jobs
-
Press on the WorkBee-First-Project.gcode File.
-
Press 'Yes' to start.
-
-
-
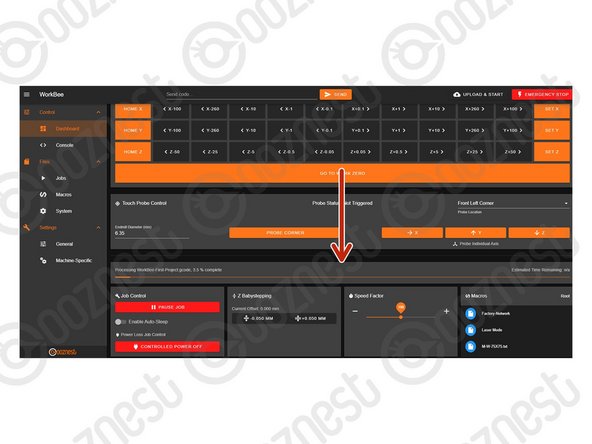
When running a job, the progress of the job will be displayed here along with the percentage complete and estimated time remaining.
-
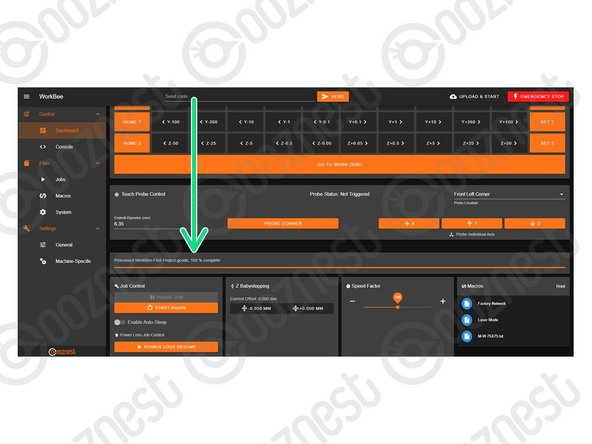
Wait for the Job to be 100% Complete and the machine has stopped moving.
-
Switch off the Router Head.
-
Switch off your Extractor (If applicable).
-
Press 'Home All'
-
-
-
Unscrew the Project.
-
-
-
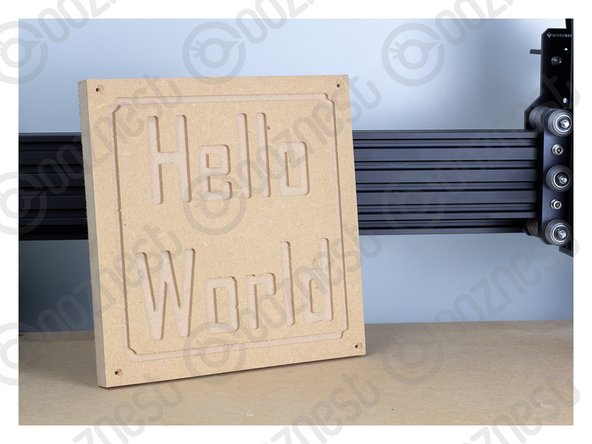
Congratulations you have finished your First Project on the Original WorkBee Z1+ CNC Machine.
-
Share your project on Instagram tag @Ooznest and use #WorkBee
-
-
-
Completing your First Project was rewarding right?
-
Now you can learn how to create projects using CAM Software.
-
Vectric - The Basics
-
Carveco - Tutorial Projects
-
Learn more about WorkBee Control
-


Thanks for following the guide. Any issues, please contact us!
Thanks for following the guide. Any issues, please contact us!
Cancel: I did not complete this guide.
13 other people completed this guide.
