
Introduction
In this guide we will run through the steps to connect and configure a touch probe to your WorkBee or OX CNC running an XPRO controller.
-
-
Locate the Input screw terminals on the XPRO board.
-
Identify the Ground and Touch Probe inputs.
-
The wire attached to the crocodile clip, should be screwed into the ground terminal.
-
The remaining wire (attached to the Probe) should be screwed into the probe terminal.
-
-
-
Open up Universal G-code Sender (UGS) & connect to your WorkBee or OX CNC as normal.
-
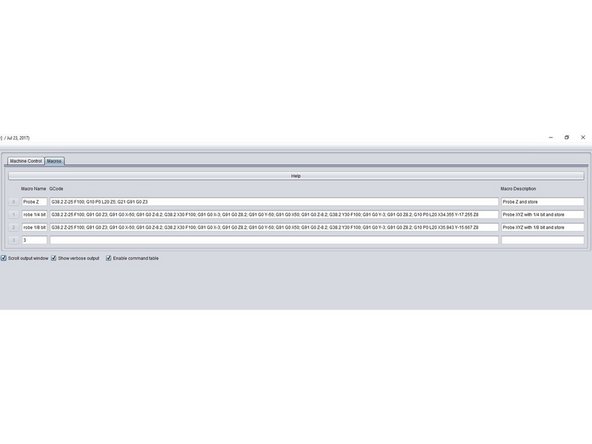
Locate and click on the Macros tab.
-
On this tab we can set-up a number of macros to work with the Touch Probe.
-
The first macro we will make is to probe the Z axis and store this value.
-
In the Macro Name field, give your macro a name. In our case we will use "Probe Z".
-
The next field is where we enter the GCode for our Macro. To probe and store the Z axis information we enter the GCode below. These commands are explained in the documents at the bottom of this guide.
-
G38.2 Z-25 F100; G10 P0 L20 Z5; G21 G91 G0 Z3
-
Lastly we can give our new macro a description such as "Probe Z and store"
-
-
-
To add more macros follow the steps above and use the PDF and spreadsheet documents at the bottom of this guide to configure your G-Code commands.
-
-
-
Now that you have set up your macros, for each size bit you want to use (1/4, 1/8, 1/16 etc) it's time to put them to action and find your zero point.
-
Once you have set up your job, ensuring the work piece is clamped down securely, then home your machine.
-
Place the touch probe on the bottom left corner of your work piece.
-
Now use the jog axis commands to centre the bit within the probe. Then attach the crocodile clip to the bit in your router.
-
You can then run your selected macro by pressing the correct macro number.
-
In this example we ran the macro to probe X, Y and Z for a 1/4" bit. When the macro had finished we told the WorkBee CNC to return to the zero point.
-


You are now set to use a touch probe and easily locate your work piece corners.
You are now set to use a touch probe and easily locate your work piece corners.
Cancel: I did not complete this guide.
14 other people completed this guide.
Attached Documents
3 Comments
Hello, I followed your tutorial and everything is fine. The question I wanted to ask you is that you have to do later to use that calculation of the zero position when I send a file to the cnc machine.I would be very grateful if you can resolve this doubt.a greeting
Gonzalo Bullon - Resolved on Release Reply