
-
-
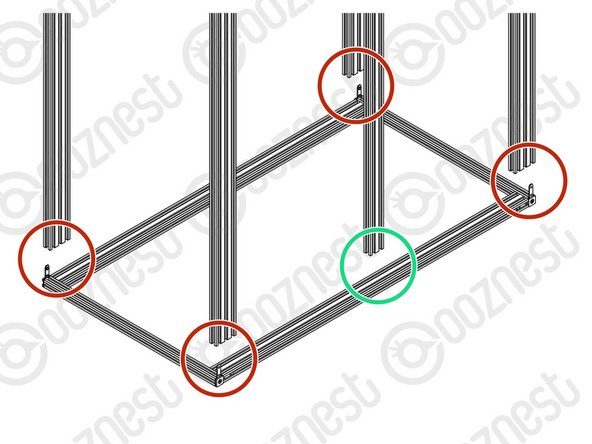
Fix a Maker-Link onto both ends of Extrusion I (V-Slot-2020-620mm-T) using a M5-Button-Head-Bolt-8mm adding an End-Cap on top to secure it in place.
-
Repeat this step for Extrusion I's
-
-
-
Locate Extrusion K's (V-Slot-2040 - 750mm, 1000mm or 1250mm depending on your enclosure size). Lay one of them on a flat surface and connect it to the Maker-Link on one end of an Extrusion I and tighten the grub screws.
-
Add another Extrusion K to the opposite end of the Extrusion I
-
Before proceeding this would be the time to add the panel material.
-
Close off the frame with a final Extrusion I on the opposite side.
-
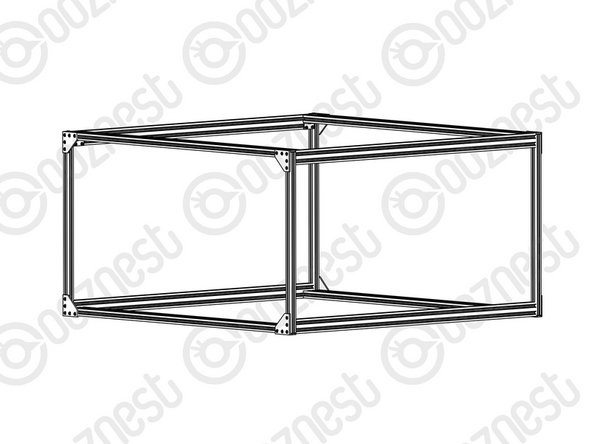
This is the Back-Frame.
-
Repeat this step for a second frame assembly. Do not add panel material to this frame, as the doors will go inside this frame.
-
This is the Front-Frame.
-
-
-
With the Front-Frame on a flat surface slide the Extrusion L (V-Slot-2060 - 670mm, 920mm or 1170mm depending on your enclosure size), onto the 4 x Maker-Links on the Front-Frame.
-
Tighten the Maker-Link grub screws until they lock the Extrusion in place.
-
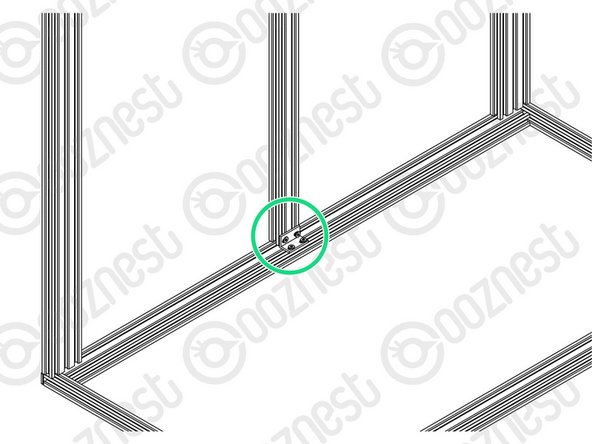
Secure Extrusion J (V-Slot-2040 - 670mm, 920mm or 1170mm depending on your enclosure size), centrally to Extrusion K on the Front-Frame using a Universal-L-Bracket.
-
The side with the central Extrusion J is the top of the enclosure.
-
Before proceeding this would be the time to add the panel material either side of Extrusion J.
-
-
-
Add the Back-Frame onto Extrusion L's. Tighten the Maker-Link grub screws securely.
-
Secure the central Extrusion J to the Back-Frame using a Universal-L-Bracket.
-
-
-
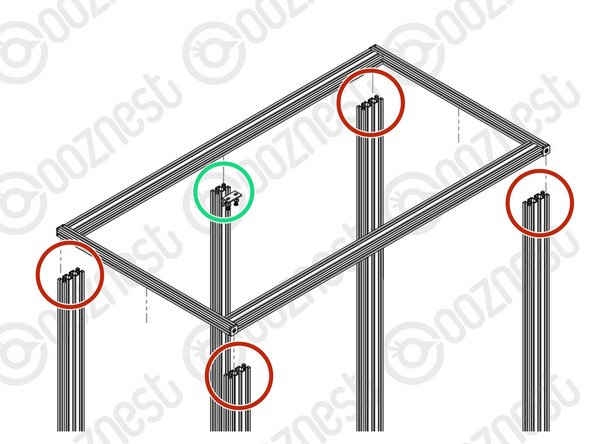
At each corner fix a Universal-L-Bracket between the Extrusion K's and Extrusion L's and tighten the M5-Button-Head-Bolt-8mm.
-
-
-
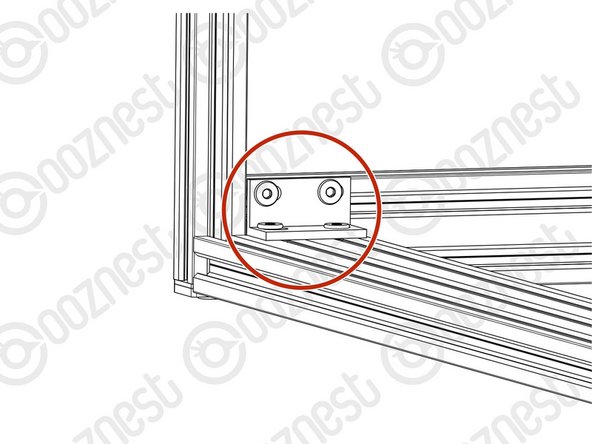
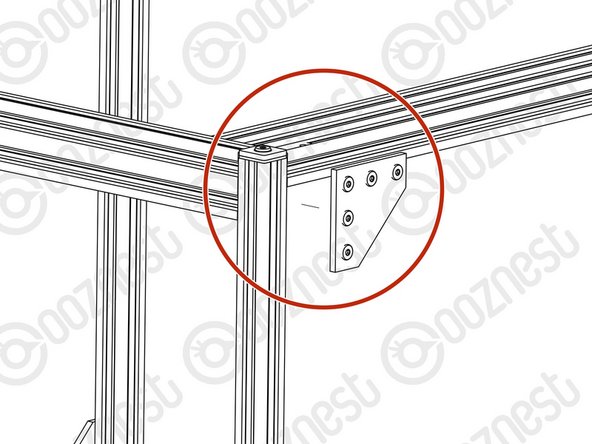
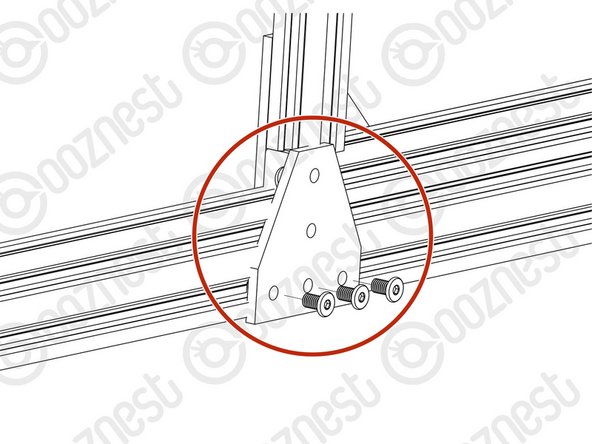
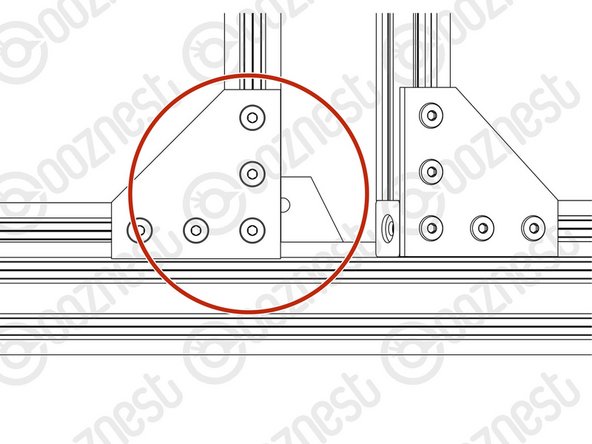
Secure a Corner-Joining-Plate to the corners where all Extrusion I's and Extrusion L's meet.
-
Repeat this for all 8 corners
-
-
-
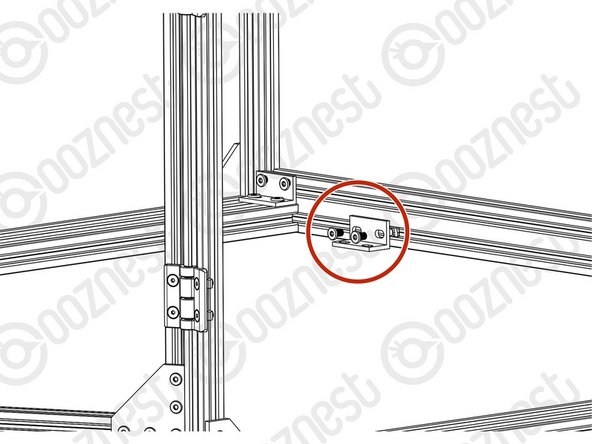
Fix a T-Joining-Plate centrally to the bottom Extrusion K. This will function as a stop for the two doors.
-
-
-
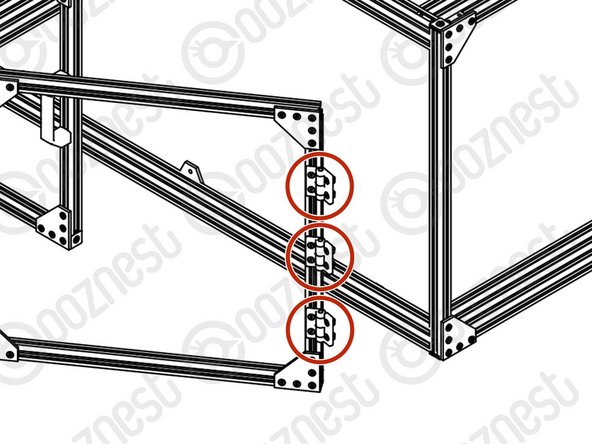
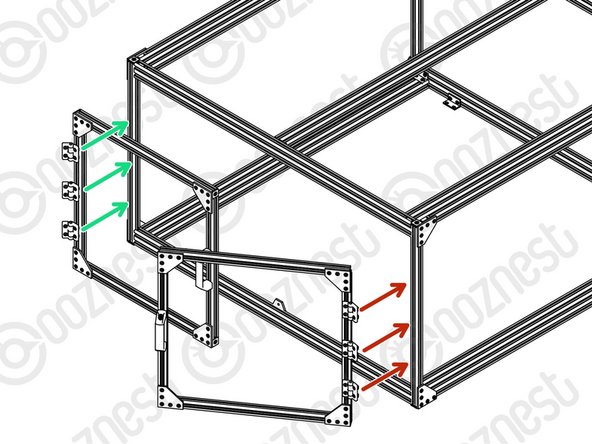
Mount a door by attaching the Door-Hinges on the door frame to Extrusion I using M5-Button-Head-Bolt-8mm
-
Take time centring the door so it does not catch on the frame extrusions.
-
Repeat this step for the other door.
-
-
-
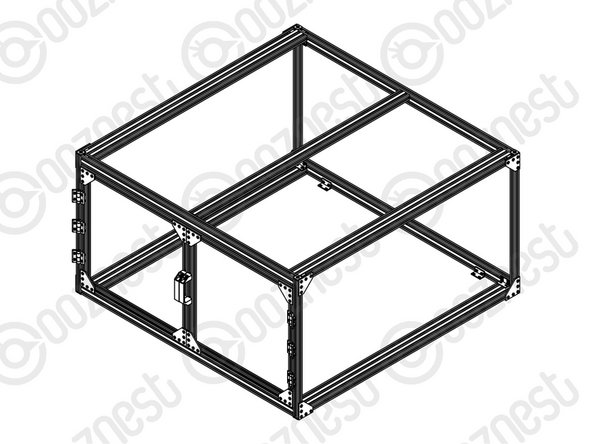
Using the Fix Down Universal-L-Bracket, fix them into Extrusion K front and back on the inside on the enclosure. These will allow you to secure the Enclosure to your work bench.
-
-
-
Congratulations you have finished building your Original WorkBee Enclosure.
-


Thanks for following the guide. Any issues, please contact us!
Thanks for following the guide. Any issues, please contact us!
Cancel: I did not complete this guide.
7 other people completed this guide.

2 Comments
Hurrah, that’s everything assembled! now to put this to work.
Doors are a very tight fit, would recommend more clearance and a foam seal?
david.birch@essex.ac.uk - Resolved on Release Reply