
-
-
Making sure the board is orientated in the correct way as displayed in the image.
-
The Large Cable Tie highlighted in Orange is for the 4 Stepper Motor Cables and the Limit Switches.
-
The Small Cable Tie highlighted in Red is for the power cable.
-
The Small Cable Tie highlighted in Yellow is only needed if you have the Ethernet Version, and is to secure the Ethernet Cable.
-
-
-
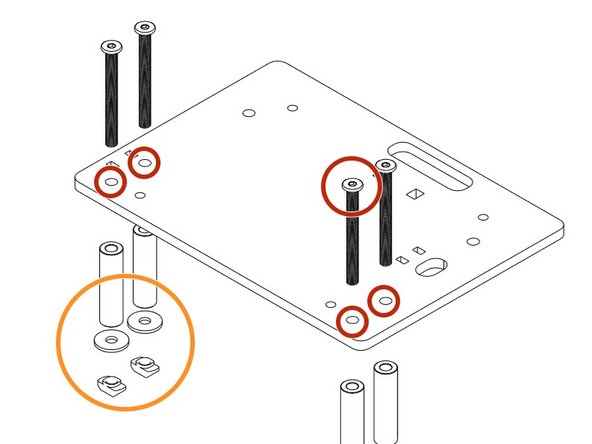
Insert a M4 Cap Head Bolt 20mm through each hole on all 4 corners on the Duet 3D Controller.
-
Onto each bolt slide a 1/4" Nylon Spacer.
-
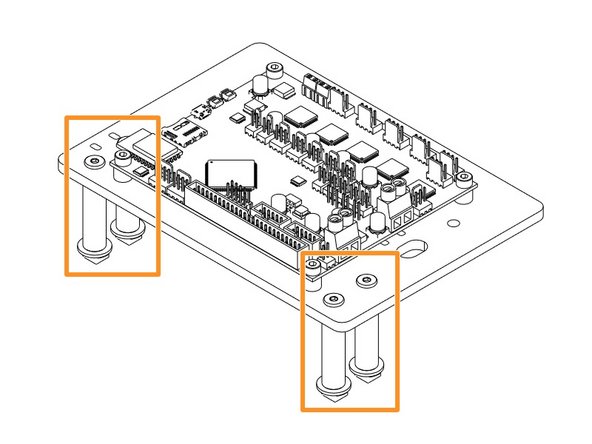
Now it is time to join the Duet to the Duet Mount. Insert the bolts into the holes on the Duet Mount and secure using 4 x M4 Nyloc Nuts.
-
-
-
Insert 4 x M5 Low Profile Bolts through the holes indicated in the image.
-
Place a 1-1/2" Aluminium Spacers over each bolt followed by a Slot Washer and finally a M5 Drop in Tee Nut.
-
Once assembled line up with the 2040 Extrusion on the right hand side of the machine and fix into place tightening the M5 Bolts until the Tee Nuts engage
-
-
-
The connectors for the Duet controller are keyed, so there is only one way which they can plug in.
-
For 750x1000mm Screw Drive Machines and 1000x1000mm Screw Drive machines, the Right Y-Axis motor wire may have different wire colors to the other motor wires. This is normal, connect the wires as normal.
-
The Mains Power should remain off during all wiring of the Duet Controller.
-
PSU Cable from Power Supply - Connect Red Positive Wire into the Top Screw Terminal and Black into Bottom Screw Terminal.
-
-
-
Z-Axis Stepper Motor Wire.
-
Left Y-Axis Stepper Motor Wire.
-
X-Axis Stepper Motor Wire.
-
Right Y-Axis Stepper Motor Wire.
-
-
-
Z-Axis Limit Switch
-
Y-Axis Limit Switch
-
X-Axis Limit Switch
-
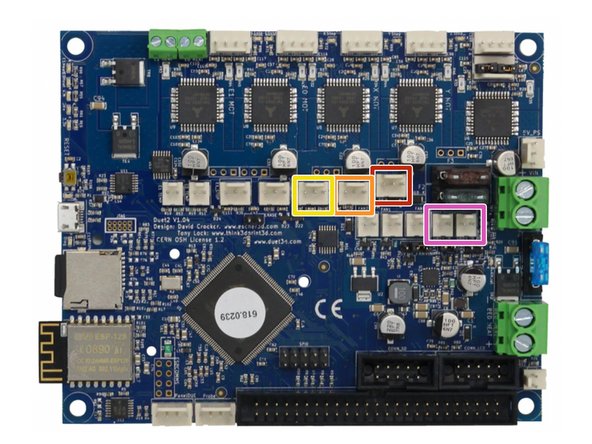
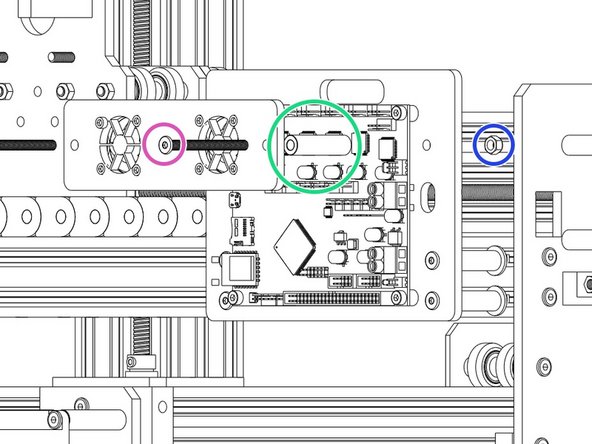
Fans connected to either of the Always on Fan Terminals.
-
-
-
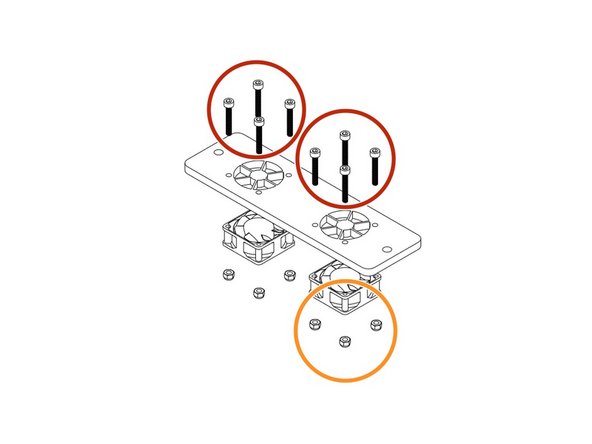
Use 8 x M3 Cap Head 20mms to fix the fans highlighted in Yellow onto the Mount with the Fan label facing outward.
-
Secure the M3 Cap Head 20mm's using 8 x M3 Nyloc Nuts.
-
Thread 2 x M5 55mm Low Profile Bolts through the fan mount.
-
Slide the Aluminium Spacers highlighted in Green over the bolts.
-
Now attach to the Main Board mount using 2 x M5 Nyloc Nuts.
-
Remember to connect the fans to 'Always On' Fan connection of your Duet Controller before tightening the M5 Nyloc Nuts.
-
-
-
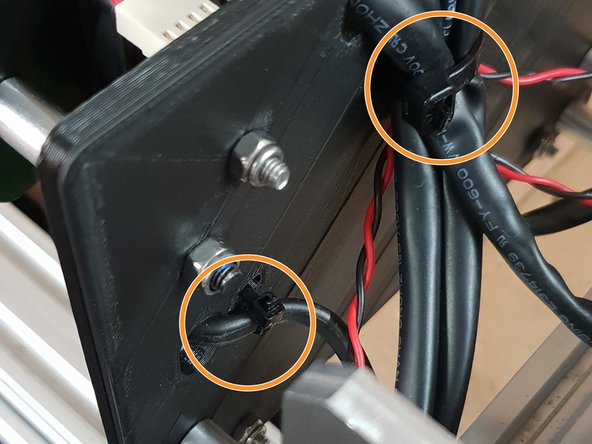
Using the already inserted cable ties fix the wires into place securely to prevent any unnecessary movement and to keep the machine looking neat!
-
If you have the Ethernet version also secure that.
-
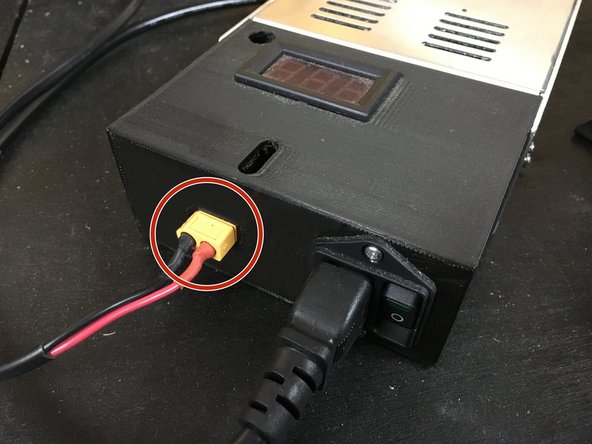
Plug the PSU-Output-Power-Cable into the XT60-Male Output on the assembled 24V-360W-Power-Supply.
-


Thanks for following the guide. Any issues, please contact us!
Thanks for following the guide. Any issues, please contact us!
Cancel: I did not complete this guide.
19 other people completed this guide.

12 Comments
Hi, I can’t access the “Limit Switch Assembly & Mounting” guide so I will post the question under this topic. DuetWifi with its TMC2660 is capable of homing without limit switches based on stall detection. As far as I know Dc42 said while the precision don’t have to be enough (homing precision is crucial) for delta motion, it should be ok for cartesian motion. Ryan what is your opinion on this on Workbee?
Hi Lukas, Thanks for making us away of this! They should now be live on the webiste, Can you email that query over to sales@ooznest.co.uk and someone from Technical will get back to you.
Thanks Ryan
I realised as I was installing the x-axis toothed belt, I had mounted the x-axis c-beam back to front. This doesn’t appear to affect the functionality of the machine but did mean that the adjustment holes for the belt clamps didn’t line up with the appropriate holes. Tried to dismantle the x-axis but the bolts securing the c-beam wouldn’t easily undo (the hex hole started to deform).
My solution was to drill holes in the correct place, tap them to suit the M5 bolts and then finalise the installation of the belt. I did add an M5 nyloc nut on the outside just to make sure.
Peter Plail - Resolved on Release Reply
Is there a concern if you cut aluminum with small amount of fluid cooler to have the electronic exposed on the back of the X gantry? On my older Ozznest CNC machine I have a custom box under the table.
Also, some recommend not to wire the limit switch along power/stepper wires; any insight on this?
Thanks
Alexandre Eichenberger - Resolved on Release Reply
Hi,
If your coolant is water then i would be more careful. If cutting oil is used then that should be ok, as it is a heavier fluid and doesn’t flick up like water would. We haven’t seen any issues using oil.
With regards to the limit switches, that hasn’t been a problem we have seen. But we have seen that when using a USB Cable, however the Duet is wifi/ethernet so this isn’t a concern.
Best Regards
Ryan Lock