
-
-
We recommend using 18mm MDF for the Spoilerboard. This will give a maximum cut depth the whole way through of 44mm.
-
Cut the Spoilerboard to size following the dimensions given here: here
-
For the 1500x1500mm ideally you should try and source a 10' x 5' sheet of 18mm MDF.
-
At each end of the Spoilerboard, 10mm in from the edge, drill four 5mm Diameter Holes. One in each corner, and then evenly spaced in the middle.
-
For each hole drill a 10mm diameter counterbore, 11mm deep.
-
-
-
Using 8 x M5-Button-Head-Bolt-12mm and 8 x M5-Drop-In-Tee-Nut secure the Spoilerboard to the front and back Extrusion-A's.
-
Make sure the M5-Drop-In-Tee-Nuts are engaged with the slot on Extrusion-A.
-
A good technique, is to tighten, then loosen the bolt, then tighten, each time tightening a bit more. This helps the M5-Drop-In-Tee-Nut to engage with the slot.
-
Once you have the Spoilerboard in place you use a variety of methods to hold down your projects.
-
The UJK System from Axminster is very good.
-
Or you can also do a pronged tee nut system.
Are there any other methods available for securing the spoiler board to the base, ones that don't use the M5-DROP-IN-TORTURE-NUTS?
Even with the measurements from above the nuts won't lock.
Many thanks
Richard Tapley - Resolved on Release Reply
Hi, I downloaded Cut2D Pro to create the grid to insert the pronged tees, however the free trial doesn't allow to download the toolpath.
I'm a bit stock as different softwares offer trial sample files but to do this I need to set up my spoilerboard.
Would you, by any chance have a toolpath for the grid of pronged tees for a 1500 x 15000 spoilerboard I could try ? Thank you!
Hi Melissa,
We don't have a file available, but you could use free software like Easel to do the pronged tee nuts.
Thanks.
Hi, the link to the pronged tee nut system says the following:
Files are no longer available for this project due to different size Pronged Tee Nuts and Endmills being used in the Video causing issues when made physically.
- May I ask what's the recommended pronged tee nuts to use in the 18mm MDF? Is it M5?
- Also, what's the recommended depth on the back of the spoilerboard to make sure the pronged tee is flat? is it about 2mm?
Thank you!
Hi Melissa,
M5 prongs is best for the spoilerboard.
The depth on the back would depend on the prongs. So I would buy them, then measure them, 2mm would probably enough.
Thanks.
-
-
-
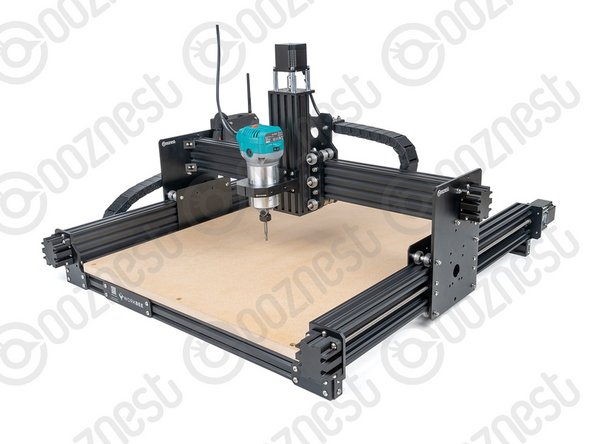
Congratulations you have finished building your Original WorkBee Z1+ CNC Machine.
-
Your journey into the world of CNC has only just begun.
-
Whats Next?
-
Finish Assembling Your Original WorkBee XYZ Touch Probe From Step 5 onwards.
-
Then read the Safety Instructions.
-
Complete your First Project
-


Thanks for following the guide. Any issues, please contact us!
Thanks for following the guide. Any issues, please contact us!
Cancel: I did not complete this guide.
30 other people completed this guide.

4 Comments
It might not be right but I made the countersink hole more shallow and used a longer M5 Bolt (16mm) with a washer below the cap to hold the spoilerboard down…
Still was quite difficult to get the Tee-Nuts to engage properly.
Ivan Flack - Resolved on Release Reply
Hi Ryan, I found a countersink depth of 15mm a bit too deep as the M5 x 12mm bolts bottomed in the slot. I reduced the countersink depth to about 12mm and was pleased with the result.
Ian Martin - Resolved on Release Reply
Hi Guys
Uni board do 10 x 5's you can find them here https://uniboards.co.uk/products/10-x-5-...
Little bit pricey but saves messing around.
mathew - Resolved on Release Reply
I think I will need to use a 2 piece spoiler board for my 1500 x 1500 - is there a particular jointing method that would work best - half-lap joint / biscuits / dowels etc? I had concerns about biscuits or dowels in case the cutter exposes one and it causes movement. Hope that doesn’t sound too paranoid!,
Stewart - Resolved on Release Reply
Hi Stewart,
Thanks for your comment. You can use two pieces. If you put the joint running from front to back, you can then put the joint on top of one of the spoilerboard supports. This combined with your biscuit joints would work really nice.
Rob
Robert -
For my 1500x1500 WorkBee I’m cutting my spoiler board 898mm x 1500mm and 462mm x 1500mm so the so i can join them on the extrusion.
Rolf Black - Resolved on Release Reply
If projects are tiled or section for surfacing too large and need to be done in stages would it be better to have a spoilboatd that is just the right size and surface levelled or will the recommended dimensions will all be surfaced flat.
gibsrich@hotmail.co.uk - Resolved on Release Reply
If you plan to do push throughs or tiling, then best to make the spoilerboard the same size as the working area. Otherwise when you surface the normal size, you will get a lip.
Robert -
Many thanks for the reply, so would I just need to move the spoilerboard supports to match the bolt holes which i assume would be at the corners of 2pieces.
gibsrich@hotmail.co.uk - Resolved on Release Reply
Hi,
You could make it out of 2 x 8x4 sheets.
Put the join going from front to back, and the join be over the top of one of the spoilerboard supports.
Or make the spoilerboard the same size as the working area 1270x1270mm, an 8x4 is 1200x2400. So it would be very close to the same size.
Robert - Resolved on Release Reply
Is there a workaround for the spoilerboard if we can't source 10ft by 5ft sheet of MDF in my local vicinity?
gibsrich@hotmail.co.uk - Resolved on Release Reply