Introduction
This guide goes over connecting to your WorkBee CNC Machine, updating the WorkBee firmware to the latest release.
Please read before proceeding to avoid damaging the controller and voiding your warranty
Do not have the USB cable connected at the same time as the Mains Power.
Do not connect the WorkBee to a computer via USB when you don't need to. The Duet has either an Ethernet or WiFi connection, so USB is generally used only when debugging and initially commissioning the controller. All CNC Operations including uploading G-Code files can be done via the web interface.
Do not connect the Duet via USB to a laptop running off mains power.
Other devices powered from the mains may create ground transients. These will flow through the USB cable and may cause the Duet to reset or perform abnormally.
At no point should you press the reset button on your Controller as this can potentially erase the firmware and require your controller to be sent back for testing.
-
-
Download the latest firmware from: WorkBee Firmware Releases
-
Unzip the folder to somewhere on your computer.
-
Do not unzip any folders inside this one.
-
-
-
The WiFi & Ethernet Duets require a different setup format depending on how you are connecting to it, please follow the appropriate Step for your Workbee.
-
If your version is different please - Click Upload Files under the Settings - General Tab in the Duet Web Control.
-
For Wifi Connected to an External Network.
-
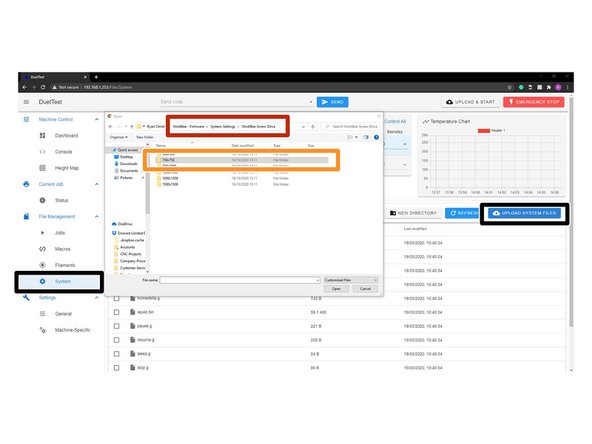
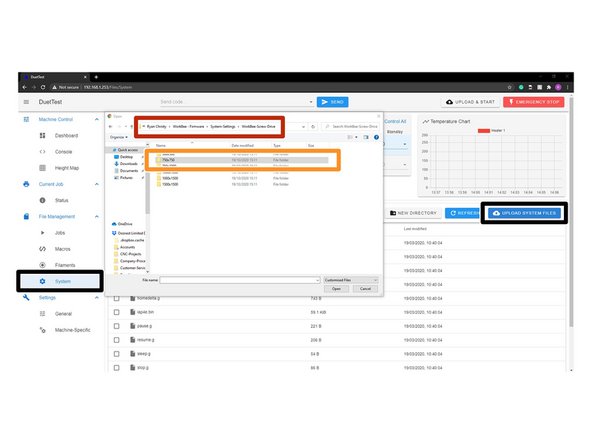
Click Upload System Files under the File Management - Settings Tab in the Duet Web Control.
-
Open the latest version of the Firmware, navigate to System Settings.
-
Choose the Machine Drive and Size folder.
-
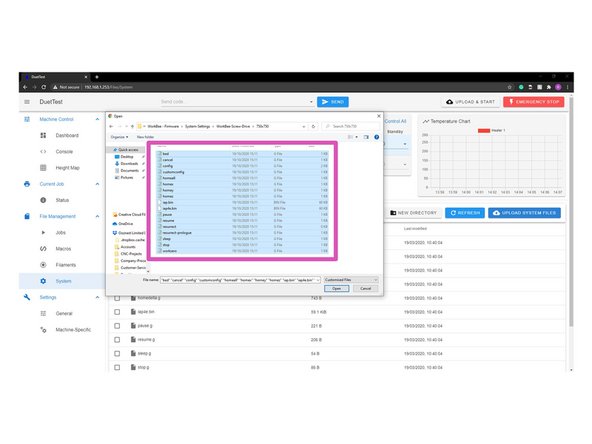
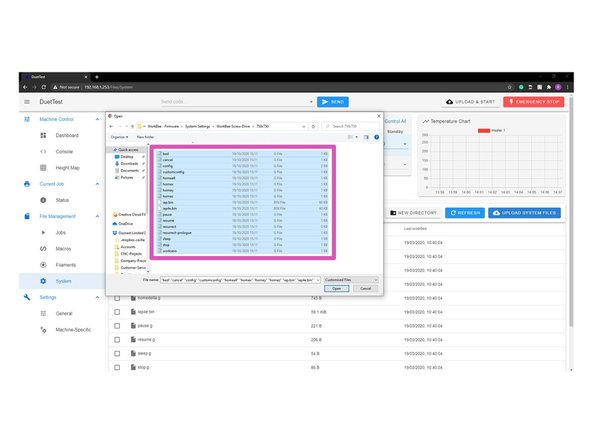
Select all files inside that folder and click open to upload them to the Duet.
-
The controller should automatically reboot after the upload is complete. If not please press the emergency stop button to force restart the controller.
I guess your process has changed, as in the current firmware package I just downloaded, I’m not seeing any folders for different machine drive and sizes.
Is this correct?
Joost van Putte - Resolved on Release Reply
Hi Joost,
Yes, that is correct. Our system settings are now just a folder for each connection method.
Robert
Robert -
-
-
-
The WiFi & Ethernet Duets require a different setup format depending on how you are connecting to it, please follow the appropriate Step for your Workbee.
-
For Wifi Connected as an Access Point. If your version is different please - Click Upload Files under the Settings - General Tab in the Duet Web Control.
-
Click Upload System Files under the File Management - Settings Tab in the Duet Web Control.
-
Open the latest version of the Firmware, navigate to System Settings.
-
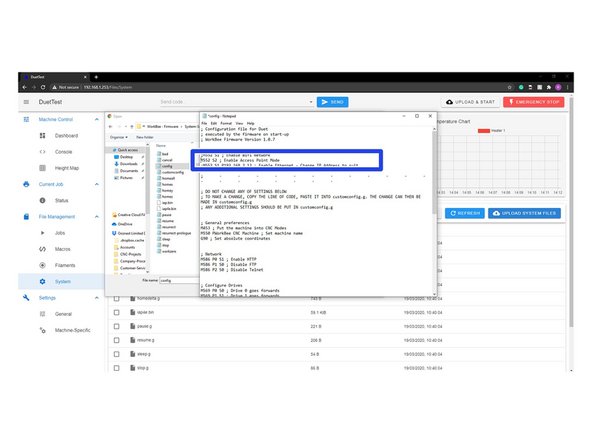
Choose the Machine Drive and Size folder. Once the folder is open right click on config.g and click edit.
-
In Notepad add a semicolon in front of M552 S1 and remove the semicolon from the front of M552 S2, save and close this file.
-
Select all files inside that folder and click open to upload them to the Duet.
-
The controller should automatically reboot after the upload is complete. If not please press the emergency stop button to force restart the controller.
-
-
-
The WiFi & Ethernet Duets require a different setup format depending on how you are connecting to it, please follow the appropriate Step for your Workbee.
-
For Ethernet Connected directly to a computer. If your version is different please - Click Upload Files under the Settings - General Tab in the Duet Web Control.
-
Click Upload System Files under the File Management - Settings Tab in the Duet Web Control.
-
Open the latest version of the Firmware, navigate to System Settings.
-
Choose the Machine Drive and Size folder. Once the folder is open right click on config.g and click edit.
-
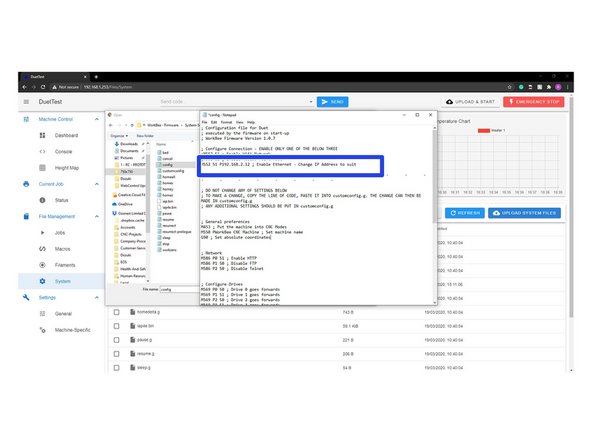
In Notepad add a semicolon in front of M552 S1 and remove the semicolon from the front of M552 S1 P192.168.2.12, change the IP Address to suit based on the previous completed guide 2. Connecting your Duet to a Network - Ethernet Save and close this file.
-
Select all files inside that folder and click open to upload them to the Duet.
-
The controller should automatically reboot after the upload is complete. If not please press the emergency stop button to force restart the controller.
This is a bit confusing because what actions performed on the local machine and on the web interface are mixed up. To upload the new system files you go to File Management > System > Upload System Files on the new version.
Chris Davies - Resolved on Release Reply
Hi Chris,
Thanks for your comment that is correct if your Duet has the WorkBee Control installed but the controllers are shipped with a different version of the WorkBee firmware, I will include this in the Step as Duet have changed the layout slightly which can be confusing for previous versions.
-
-
-
If your version is different please - Click Upload Files under the Settings - General Tab in the Duet Web Control.
-
In WorkBee Web Control go to Settings > General
-
Press Upload System Files
-
Navigate to the unzipped firmware folder and select "Duet2CombinedFirmware.bin"
-
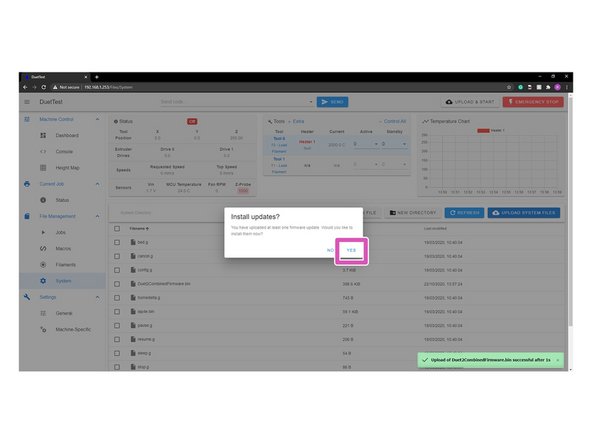
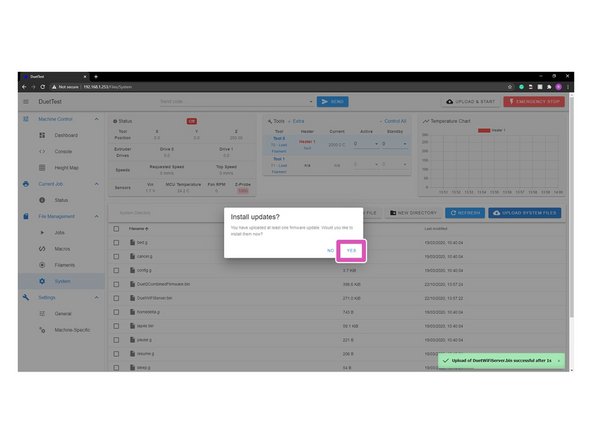
Wait for the file to upload, and press "Yes" on the update prompt.
-
Wait for the update to complete.
-
The controller should automatically reboot after the update is complete. If not please press the emergency stop button to force restart the controller.
To upload the new system files you go to File Management > System > Upload System Files on the new version.
Chris Davies - Resolved on Release Reply
-
-
-
If your version is different please - Click Upload Files under the Settings - General Tab in the Duet Web Control.
-
Only complete this step if you have the Wifi version of the Duet Controller.
-
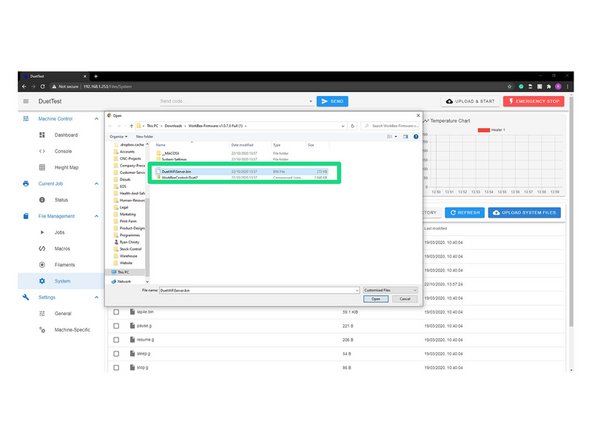
Repeat Step 5 but this time for DuetWifiServer.bin (If applicable)
-
Wait for the file to upload, and press "Yes" on the update prompt.
-
The controller should reboot automatically after the update is complete. If not please press the emergency stop button to force restart the controller.
-
-
-
If your version is different please - Click Upload Files under the Settings - General Tab in the Duet Web Control.
-
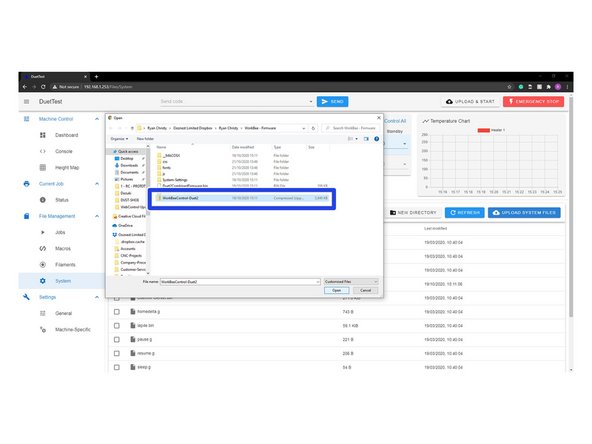
For all versions, repeat Step 5, but this time for WorkBeeControl-Duet2.zip this will now update your WorkBee CNC Machine to have the latest WorkBee Control User Interface.
-
Upload the .zip file. Do not unzip it before hand.
-
The controller should reboot automatically after the update is complete. If not please press the emergency stop button to force restart the controller.
-
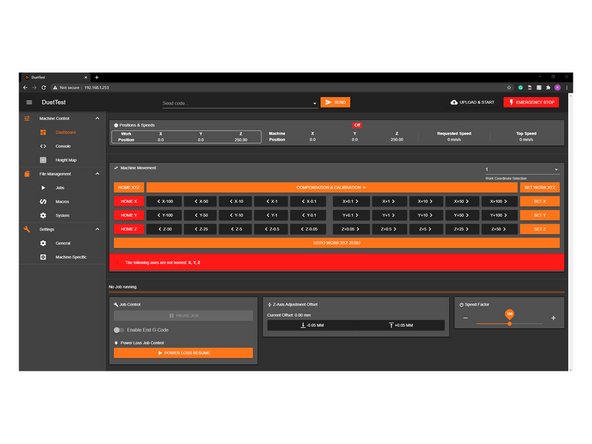
The interface should now look like image 2. If after rebooting you are still seeing the old interface, please close the current browser tab, and open a new one connecting to the same IP Address.
Hi, I am experiencing a lag in the interface after this last step. The site loaded all files, except the last ‘app.’ files. I can no longer get through with the IP address to the WorkBee Control interface. How could this be solved?
Samuel Kankaanpää - Resolved on Release Reply
A prominent note to inform people about the lag before the User Interface responds would save a lot of support calls.
Alex Chambers - Resolved on Release Reply
-
Thanks for following the guide. Please move onto the next guide to learn how to use your WorkBee CNC Machine. Any issues, please contact us!
Thanks for following the guide. Please move onto the next guide to learn how to use your WorkBee CNC Machine. Any issues, please contact us!
Cancel: I did not complete this guide.
15 other people completed this guide.
3 Comments
After managing to complete this step last time I was working on the router I have come into the workshop today to find that I cannot connect anymore to the duet IP in my internet browser.
I’m doing exactly the same as I did before but am now getting this message:
“This site can’t be reached
*********** took too long to respond”
Why can I no loner connect when I’m using the same wifi etc?


